How to login to myrouter.local?
LOGGING IN TO YOUR ROUTER'S WEB INTERFACE VIA "MYROUTER.LOCAL" INVOLVES A STRAIGHTFORWARD PROCESS. THIS GUIDE WILL WALK YOU THROUGH THE STEPS TO ACCESS YOUR ROUTER SETTINGS USING THIS WEB ADDRESS.
Step 1: Ensure Connectivity Ensure your device (computer, laptop, smartphone, or tablet) is connected to the router's Wi-Fi network. This connection is essential for accessing the router's web interface.
Step 2: Open a Web Browser Launch a web browser of your choice, such as Google Chrome, Mozilla Firefox, Safari, or Microsoft Edge.
Step 3: Enter the Address In the address bar of the web browser, type "http://myrouter.local" and press "Enter."
Step 4: Wait for Redirect After hitting "Enter," your browser will attempt to access the router's web interface using the "myrouter.local" address. The router will then redirect you to the appropriate IP address associated with the "myrouter.local" web address.
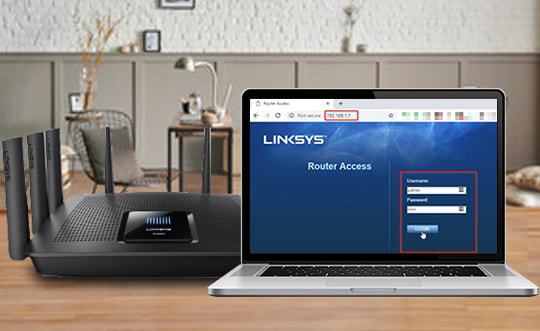
Step 5: Login Page Once the redirect is complete, you will be directed to the router's login page. This page typically prompts you to enter a username and password to access the router settings.
Step 6: Enter Login Credentials Enter the correct username and password for your router. These credentials are often printed on a label on the router itself or provided in the router's documentation. If you've changed the credentials before, use the updated ones.
Step 7: Access the Web Interface Upon successful login, you will gain access to the router's web interface. Here, you can configure various settings related to your network, security, wireless options, and more.
Step 8: Explore and Configure Navigate through the different sections of the web interface to configure your router settings according to your needs. Remember to save any changes you make.
Step 9: Logout After you've finished configuring your settings, it's important to log out of the router's web interface for security reasons. Look for a "Logout" or "Sign Out" option within the interface.
Step 10: Close the Browser Once you've logged out, close the web browser to ensure that your router's settings remain secure.
Please note that the exact steps might vary slightly depending on the router model and firmware version you're using. If "myrouter.local" doesn't work, you can also try accessing the router's web interface using its default IP address (e.g., 192.168.1.1 or 192.168.0.1). Always refer to your router's user manual or manufacturer's website for specific instructions related to your device.
Step 1: Ensure Connectivity Ensure your device (computer, laptop, smartphone, or tablet) is connected to the router's Wi-Fi network. This connection is essential for accessing the router's web interface.
Step 2: Open a Web Browser Launch a web browser of your choice, such as Google Chrome, Mozilla Firefox, Safari, or Microsoft Edge.
Step 3: Enter the Address In the address bar of the web browser, type "http://myrouter.local" and press "Enter."
Step 4: Wait for Redirect After hitting "Enter," your browser will attempt to access the router's web interface using the "myrouter.local" address. The router will then redirect you to the appropriate IP address associated with the "myrouter.local" web address.
Step 5: Login Page Once the redirect is complete, you will be directed to the router's login page. This page typically prompts you to enter a username and password to access the router settings.
Step 6: Enter Login Credentials Enter the correct username and password for your router. These credentials are often printed on a label on the router itself or provided in the router's documentation. If you've changed the credentials before, use the updated ones.
Step 7: Access the Web Interface Upon successful login, you will gain access to the router's web interface. Here, you can configure various settings related to your network, security, wireless options, and more.
Step 8: Explore and Configure Navigate through the different sections of the web interface to configure your router settings according to your needs. Remember to save any changes you make.
Step 9: Logout After you've finished configuring your settings, it's important to log out of the router's web interface for security reasons. Look for a "Logout" or "Sign Out" option within the interface.
Step 10: Close the Browser Once you've logged out, close the web browser to ensure that your router's settings remain secure.
Please note that the exact steps might vary slightly depending on the router model and firmware version you're using. If "myrouter.local" doesn't work, you can also try accessing the router's web interface using its default IP address (e.g., 192.168.1.1 or 192.168.0.1). Always refer to your router's user manual or manufacturer's website for specific instructions related to your device.
Changing the Linksys WiFi password is a simple process that enhances the security of your wireless network. Follow these steps to modify your WiFi password:
Step 1: Access the Router's Web Interface
Remember that the exact steps might vary based on your Linksys router model and firmware version. If you encounter any difficulties, consult the router's documentation or reach out to Linksys customer support for assistance.
Step 1: Access the Router's Web Interface
- Connect to your Linksys router's WiFi network using a device (computer, smartphone, tablet).
- Open a web browser (such as Chrome, Firefox, Safari) and enter the router's IP address into the address bar. The default IP address is often "192.168.1.1" or "192.168.0.1." Press "Enter."
- You'll be prompted to enter the router's login credentials. If you haven't changed them, use the default username and password (usually "admin" for both).
- After logging in, you'll have access to the router's web interface.
- Look for the "Wireless" or "Wireless Settings" tab in the router's interface. This is where you'll find WiFi-related settings.
- Locate the "Security" or "Security Mode" section.
- Find the field labeled "Passphrase," "Password," or "Key." This is where you'll enter the new WiFi password.
- Choose a strong, unique password that includes a combination of letters (both upper and lower case), numbers, and special characters.
- Enter the new password in the designated field. Make sure it's something you can remember or note it down securely.
- Save the changes. This might involve clicking a "Save" or "Apply" button, depending on your router's interface.
- After changing the WiFi password, all connected devices will be disconnected from the network.
- Reconnect your devices to the network using the new WiFi password. Locate the WiFi networks list on each device, select your network, and enter the new password when prompted.
- Don't forget to log out of the router's web interface when you're done.
- Change your WiFi password regularly to enhance security.
- Avoid using easily guessable passwords (like birthdays or "password123").
- Keep your new password in a secure place.
- If you have trouble changing the password, refer to your router's user manual or the Linksys support website for detailed instructions.
Remember that the exact steps might vary based on your Linksys router model and firmware version. If you encounter any difficulties, consult the router's documentation or reach out to Linksys customer support for assistance.
How to change Linksys Network Name (SSID)?
Changing the network name (SSID) of your Linksys router is a simple process that allows you to personalize your wireless network. Follow these steps to modify your network name:
Step 1: Access the Router's Web Interface
Changing the network name (SSID) of your Linksys router is a simple process that allows you to personalize your wireless network. Follow these steps to modify your network name:
Step 1: Access the Router's Web Interface
- Connect to your Linksys router's WiFi network using a device (computer, smartphone, tablet).
- Open a web browser (such as Chrome, Firefox, Safari) and enter the router's IP address into the address bar. The default IP address is often "192.168.1.1" or "192.168.0.1." Press "Enter."
- Enter the router's login credentials. If you haven't changed them, use the default username and password (usually "admin" for both).
- After logging in, you'll have access to the router's web interface.
- Look for the "Wireless" or "Wireless Settings" tab in the router's interface. This is where you'll find WiFi-related settings.
- Find the field labeled "SSID" or "Network Name."
- Delete the current SSID and enter your new desired network name. Choose a name that's unique and easily recognizable.
- You can also adjust other wireless settings like the WiFi channel if needed, though it's not always necessary.
- Save your changes by clicking a "Save" or "Apply" button, which is typically located at the bottom or top of the wireless settings page.
- Your router might need a moment to apply the changes. Be patient as it restarts.
- Once your router has restarted with the new network name, all connected devices will be disconnected from the network.
- Reconnect your devices to the network using the new SSID. Locate the WiFi networks list on each device, select your network, and enter the WiFi password when prompted.
- Always remember to log out of the router's web interface when you're done.
- Changing the network name won't affect your network's security settings.
- Keep your new SSID simple and easy to remember.
- Avoid using personal information or sensitive data as your SSID.
- Note that the exact steps may vary based on your Linksys router model and firmware version.
Need assistance with accessing "myrouter.local"? Our support team is here to help you navigate the process and ensure you gain seamless access to your router settings. Contact our experts now for expert guidance and troubleshooting. Your router setup is just a call away from being hassle-free.
|
|
|
